When working with PDF documents, we often need to manipulate the pages: combine two or several documents into one or, vice versa, split a long document into a few smaller parts, add a page or two from another document, delete some pages, change the order of pages, and so on. In this tutorial article you will learn how to manipulate PDF pages in ABBYY FineReader PDF 15, what are the tools, and how to use them. This information will be useful for readers who are either considering FineReader PDF 15 as a PDF solution and would like to know more about its capabilities, or who want to learn how to use their FineReader PDF 15 more effectively.
1. How to combine PDF documents into one
There are two ways to start the process: either select the PDFs to be combined in Windows Explorer and choose “Combine into one PDF…” in the right-click menu, or run FineReader PDF, click “Convert to PDF,” and select the PDF files to be combined from the Open dialogue.
To combine several PDFs as they are, with no changes and/or enhancements applied to them, continue as follows:
- Keep all the settings by default in “Convert to PDF” dialogue that opens.
- Check and adjust, if needed, the order in which the PDFs will be combined.
- Make sure “Combine all files into one document” option is set.
- Click “Convert to PDF”.
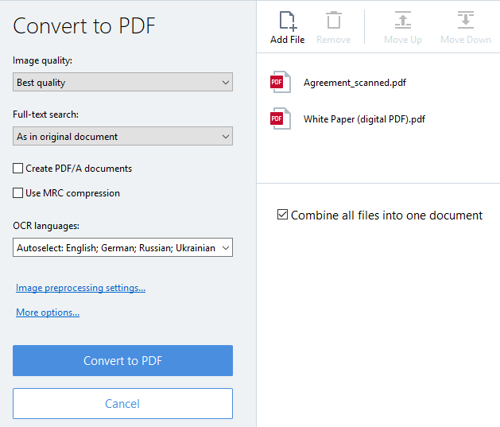
"Convert to PDF" dialogue
Additional adjustments can be made in the dialogue window “Convert to PDF”:
- Adjust image quality in the resulting combined PDF. The better the image quality, the larger the resulting file will be.
- Select if the resulting document will be searchable or not. The option “As in original document” allows you to keep the parts as they were initially: searchable pages will still allow full-text search, while non-searchable (e.g., scanned PDFs) will remain image-only.
- Select if you want to make the resulting PDF compliant with PDF/A specification for long-term archiving.
- Reduce the resulting PDF file size using MRC compression algorithms. This will need to apply OCR to all the pages of initial PDFs, so be sure to check if the document language(s) are listed in the “OCR languages” below.
- You can also have access and adjust any of the processing and saving options supported by FineReader PDF via the option dialogues available by the “Image preprocessing settings…” (will be applied to image-based PDFs) and “More options…” shortcuts.
2. Splitting a PDF into parts
With ABBYY FineReader PDF 15, you can split PDF documents into parts by:
- File size
- Number of pages
- Bookmarks of the first level
To split a PDF, use the “Split Document” tool in FineReader PDF 15. To run it, open a PDF document and go to “File” -> “Split Document…” in the main menu. Read a step-by-step how-to instruction on using this tool with this link, and also watch a short tutorial video:
In this article, we’d like to complement already available information on the feature with some useful hints and considerations you may want to take into account when using the “Split Document” tool:
- When splitting by file size, make sure that the size you specified is less than the size of the initial document.
- It may happen that some parts will have a larger size than the specified one if the initial PDF is rich in “heavy” content (such as a large number of images, fonts, interactive forms, etc.) and the specified file size limit is relatively small. If this happens, you can try reducing the size of the initial PDF first by using “Reduce File Size” option.
- If the initial PDF contains attachments, they will be saved as separate files in the “Attachments” subfolder in the same folder where you have chosen to save the result.
- Bookmarks are lost when splitting a PDF.
- When splitting by bookmarks and using bookmark labels for the names of resulting PDFs, by default the parts are also numerated at the end of the file names. So be careful if the bookmarks in your PDF end with numbers. To avoid two numbers “glued” together, you can either disable numeration at all, or change its placement to “Before name”.
- If you choose the “Custom name” option for naming the parts, the name of the original document is suggested by default.
- If there are pages with more than one first level bookmark on them, FineReader PDF will not be able to split the page into multiple parts, and all but the first bookmark on such pages will be ignored and parts for them will not be created.
3. Adding pages to a PDF file
In FineReader PDF, you can add new pages to an existing PDF from another PDF, from an image or editable file (such as DOCX, XLSX, and so on), or scan them from a paper document in a scanner.
There are three ways to start the process:
- “Add Pages” button on the main toolbar

- From the “Edit” main menu
- From the right-click menu on a page in the Pages window
Adding pages to a PDF from another PDF
- Open a PDF you want to add a page or pages to in FineReader PDF. To add pages from another PDF, use “Add Pages from PDF…” command.
- Select the PDF which you would like to take pages from. If it contains more than one page, you can use “Select pages” part of the dialogue window to indicate which of the pages to be added. Enable preview mode with the button
 to easily define the numbers of pages you want to add.
 - In the “Add:” part of the dialogue window, choose where to insert the pages. The options are: before the first page, before the current page, after the current page, after the last page.
“Add Pages from PDF…” command is your way to go if you don’t want any processing or enhancements to be applied to the pages being added. If you do, however, use “Add Pages from File…” command (described next), which allows you to apply image preprocessing and PDF enhancement features.
Adding pages to a PDF from a file
Use “Add Pages from File…” command when you need to add pages from a non-PDF file to an existing PDF. With FineReader PDF, there’s no need to first convert those pages to a PDF - the conversion will be made on-the-fly.
Another use for the command is when you want to add pages from a PDF, and those pages have to be improved. For example, you need a page from a scanned PDF, which is skewed and was scanned too dark, and you want to correct it.
The interface and usage is similar to the “Add Pages from PDF…” command described previously, however, in “Add Pages from File…” command there’s another element that gives you access to all those preprocessing and correction options: the “Settings…” button, which opens "Image Processing Settings" dialogue:
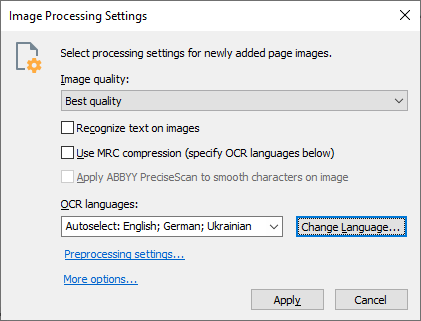
"Image Processing Settings" dialogue
There, you can set:
- Quality settings for the images. One of the options there is “Custom…”, which allows you to fine tune resolution, color, and quality level.
- “Recognize text on images” – if set, FineReader will turn scanned pages and other images with text into searchable text.
- “Use MRC compression” can reduce the resulting PDF file size, at the same time keeping the best possible visual quality of the document by applying Mixed Raster Content (MRC) compression algorithms.
- With MRC compression enabled, you can also enable PreciseScan technology to improve the visual quality of pages scanned with not enough resolution or suffering from too heavy compression. It smoothens and sharpens the character edges, making the text crisper and more easily readable.
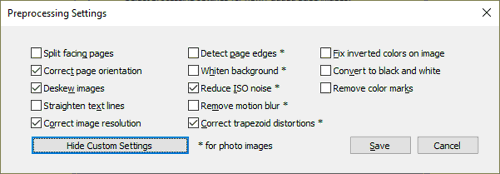
Both MRC compression and PreciseScan require the text to be OCRed, so be sure to check that the document language settings are done properly. - When adding pages from image-based files, you can specifically select which of the “Preprocessing settings…” to apply. However, in most cases, the default settings will do:
- Finally, via “More options…” shortcut, you can have access to any of the image processing, language, OCR, and PDF settings supported by FineReader PDF and adjust them for performing the current task with the best possible result.
Adding pages to a PDF from a scanner
First of all, make sure your scanner is on and properly connected to the computer.
- Open the PDF you want to add the pages to and use the “Add Pages from Scanner…” command. The scanning interface dialogue window will open.
- Select the device and set scanning options – you may find the details about setting up the scanning for better conversion results in this article of FineReader PDF help system.
- Click “View” button to preview the image of the page to be added.
- If needed, specify desired image preprocessing options in “Settings…” dialogue.
- Scan the page to be inserted in the current PDF document.
You can also create a blank page in your PDF document using the “Add Blank Page” command available in both the “Edit” -> “Add pages…” menu and from the right-click menu on a page in the Pages window.
More how-to to follow!
In the Part 2 of this article, we will take a look at how to reorder, replace, and delete pages in a PDF, create a new PDF out of the selected pages, and do other page manipulations such as rotating, cropping, and enhancing their visual appearance. Stay tuned!


